
티스토리 뷰
Redmine 4.1과 Slack을 연동 해보자
Redmine Plugin 설치
우선 Redmine은 AWS Marketplace에 있는 것을 이용해서 설치 완료 하였다.
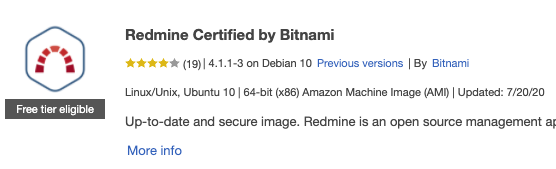
기본 아이디/패스워드는 EC2의 Action → Instance Settings → Get System Log 에 가면 있다.
찾아서 로그인 후 적당한 값으로 변경하자.
이제 Slack 과 연동하기 위해 Plugin을 설치 해야 한다.
Plugin 의 경우 https://github.com/sciyoshi/redmine-slack 여기서 다운 받았다.
아래의 순서대로 진행하자
$ sudo gem install httpclient
$ cd /opt/bitnami/apps/redmine/htdocs/plugins
$ wget https://github.com/sciyoshi/redmine-slack/archive/master.zip
$ unzip master.zip
$ mv redmine-slack-master redmine_slack
여기서 이름을 redmine_slack으로 변경해 주었는데, redmine-slack 처럼 하이픈이 들어가 있으면 나중에 bundle로 설치 할 때 파일을 못찾으면서 진행이 안되더라.
가이드에 보면 plugins 디렉토리로 들어가서 bundle install을 수행하라는데 아무리 해도 아래의 에러가 나면서 진행이 안된다.
[DEPRECATED] Your Gemfile contains multiple primary sources. Using `source` more than once without a block is a security risk, and may result in installing unexpected gems. To resolve this warning, use a block to indicate which gems should come from the secondary source. To upgrade this warning to an error, run `bundle config set disable_multisource true`.
You are trying to install in deployment mode after changing
your Gemfile. Run `bundle install` elsewhere and add the
updated Gemfile.lock to version control.

If this is a development machine, remove the /opt/bitnami/apps/redmine/htdocs/Gemfile freeze
by running `bundle install --no-deployment`.

The dependencies in your gemfile changed

You have added to the Gemfile:
* httpclient
분명 httpclient는 깔았는데 뭘까..
그래서 https://www.redmineup.com/pages/help/installation/how-to-install-redmine-plugins-on-linux 가이드를 참고해서 아래와 같이 수행했더니 정상 진행 되었다.
$ bundle install --without development test --no-deployment이후 plugins 디렉토리에서 아래와 같이 수행하니 설치 완료
$ sudo bundle exec rake redmine:plugins NAME=redmine_slack RAILS_ENV=production뭔가 마구잡이로 깔긴했는데 어디서 sudo가 필요하고 어디서 sudo가 안필요한지 잘 모르겠다.
이제 아래의 명령어로 Redmine을 재시작 하자
$ sudo /opt/bitnami/ctlscript.sh restart이제 Redmine에서 Slack 연동 Plugin을 사용할 준비가 완료 됐다.
Slack 셋팅
이제 Slack Channel에 Redmine을 연동 해보자
나는 Redmine 알림을 받을 Channel로 notify 라는 채널을 하나 생성했다.

채널 생성 후 제일 처음 뜨는 메세지를 살펴보면 Add an app 이라고 있다.
클릭하자.
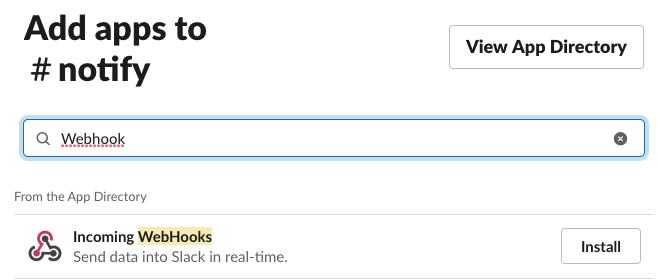
Webhook을 검색하면 Incoming WebHooks 가 나온다. 설치 하자
설치 하면 어느 채널에 Post 할 것인지 고르는 메뉴가 뜬다. notify 채널을 선택했다.
추가를 완료 하면 아래와 같이 Webhook URL이 표기 된다.

중요한 정보이니 잘 기억해 두자.
Redmine 설정
이제 Redmine 페이지로 가자
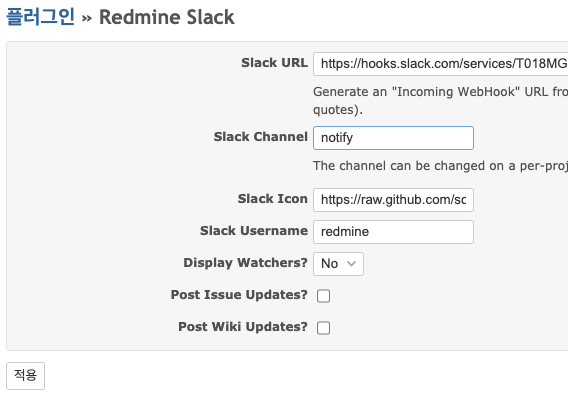
관리→플러그인→Redmine Slack 에 가서 설정 버튼 클릭. Slack URL은 위에 있는 Webhook URL을, Slack Channel은 notify를 입력하고 적용 버튼을 누른다.
이제 다시 관리→사용자 정의 항목→새 사용자 정의 항목→프로젝트 선택 후 다음 버튼을 누른다.
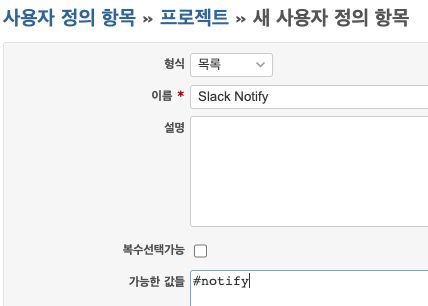
형식 : 목록
이름 : Slack Notify (원하는 값 아무 값이나 입력)
가능한 값들 : 연동을 원하는 슬랙 채널 이름 (#과 함께 입력)
을 입력 하고 만들기 버튼을 클릭 한다.
여기까지 Redmine-Slack 연동 플러그인에 대한 셋팅을 마쳤다.
Plugin - Project 연결
이제 프로젝트와 연결 해보자
프로젝트 → 원하는 프로젝트 클릭 → 설정 클릭 후 '프로젝트'탭 하단에 있는 Slack Notify 에서 원하는 채널을 선택 한다.

여기까지 수행하면, 해당 프로젝트에 변경이 있을 경우 Slack 으로 알림이 오는 것을 확인 할 수 있다.

Redmine 설정 변경
한가지 아쉬운 점은, 이슈 링크가 같이 오는데, 특별한 설정을 하지 않았다면 localhost:3000로 연결이 될 것이다.
이는 관리 → 설정 → '일반'탭 → 호스트 이름과 경로 값에 원하는 host를 입력하여 변경이 가능하다.

여기까지 수행했으면 아무 문제 없이 Slack과 연동이 마무리 된다.
레퍼런스
https://www.redmine.org/plugins/redmine-slack
https://www.redmineup.com/pages/help/installation/how-to-install-redmine-plugins-on-linux
https://docs.bitnami.com/aws/apps/redmine/configuration/install-plugins/
'Development > Etc' 카테고리의 다른 글
| [Open GL] Color 정보를 넘길 때 왜 Fragment Shader로 바로 넘기는게 안될까? (0) | 2019.05.10 |
|---|---|
| Command Line(Prompt) 으로 네트워크 어댑터 켜기/끄기 (0) | 2015.11.29 |
| Synergy 1.4.10 가 먹통되는 다양한 현상들의 해결책 (0) | 2015.09.11 |
| 뮤텍스, 세마포어, 크리티컬 섹션 차이점 (0) | 2015.07.22 |
| [Robocode] Robocode-Developer 빌드하기 (1) | 2014.07.03 |
| 무료로 쓸 수 있는 이미지 검색 (0) | 2014.05.19 |
| [ffmpeg] Visual Studio에서 ffmpeg 사용하는 방법. (2) | 2012.09.16 |
| [MAC] 맥북에어 윈도우7 부트캠프 설치 - 슈퍼드라이브나 외장ODD 없이 부트캠프로 윈도우7 설치하기 (1) | 2012.03.21 |
- Total
- Today
- Yesterday
- kering
- database
- 음악
- java
- Quiz
- winapi
- 안드로이드
- MFC
- algorithm
- Troubleshooting
- linux
- android
- jni강좌
- driver
- AWS
- jni
- 드라이버
- 프로그래밍
- Visual C++
- NDK
- 리눅스
- gcc
- C
- Python
- Cloud
- source
- it
- API
- C++
- db
| 일 | 월 | 화 | 수 | 목 | 금 | 토 |
|---|---|---|---|---|---|---|
| 1 | 2 | 3 | 4 | 5 | 6 | |
| 7 | 8 | 9 | 10 | 11 | 12 | 13 |
| 14 | 15 | 16 | 17 | 18 | 19 | 20 |
| 21 | 22 | 23 | 24 | 25 | 26 | 27 |
| 28 | 29 | 30 |